 Authoring a Journey (EDP)
Overview
A typical journey is made of different types of steps arranged into a specific sequence. All journeys have a single Start step, usually followed by one or more Action steps, such as sending an Email Campaign or granting a Loyalty Offer. By placing Wait steps in between Action steps, you can define the proper timing and cadence of the Action steps. Many journeys include a Decision step to separate consumers into different paths based on logical conditions. Optionally, you can also include Activity steps, which represent ad hoc actions a consumer might perform during the course of the journey, such as making a purchase or writing a product review. Finally, a journey must have at least one Exit step which indicates the end of the journey.
This topic focuses on authoring; that is, the process of adding steps and connectors to the journey in the desired sequence. For more information on how to configure a step, see Configuring a Journey.
Working with Steps
The features available for working with steps when authoring a journey are described below.
|
Click hereClick here
To add a new step to the journey:
-
In the Tool Bar, click the Add Step icon. The Add Step panel is displayed, showing all the different types of steps. The platform will automatically toggle on Layout Editing mode if it's not already enabled.
-
Click-and-drag the desired step type, and drop it onto the canvas in the desired position.
The available step types are as follows:
|

|
Wait
|
Specify a period of time that must elapse before executing the next step in the journey.
|
|

|
Countdown
|
For a countdown towards an event, specify a t-minus period of time that must countdown to the target date before moving on to the next journey action step. Users arriving at a countdown step will be held there until the appropriate time before the target date or event. They will then continue along the journey path as normal.
|
|

|
Action
|
Instruct the platform to execute a process, such as deploy a Messaging Campaign or grant a Loyalty Offer.
|
|

|
Decision
|
Split consumers into two paths based on their inclusion in a Segment.
|
|

|
A / B Split |
Randomly split consumers into multiple paths in order to perform an A / B test.
|
|

|
Advanced Decision
|
Split consumers into two paths based on an expression that evaluates Activity and Member Attributes.
|
|

|
Activity
|
Add a new consumer to the journey, or to move a consumer onto a different track within the journey.
|
|

|
Exit |
Remove a consumer from the journey and record the results.
|
|
|
Click hereClick here
To move an existing step:
-
On the canvas, click-and-drag the desired step, and drop it onto its desired new position.
Note: If the step has connectors attached to it, they will remain attached.
|
|
Click hereClick here
Existing Action steps in a journey can be replaced with alternatives in order to meet your business objectives. To swap an existing Action step with a different Action step type:
-
Hover your mouse cursor over an Action step, and click the "x" (delete) icon. The platform removes the Action step and replaces it with a blank placeholder.
-
Click the "+" (add) icon that appears within the placeholder step. A slide-out panel on the left displays a menu of possible Action step types.
-
From the list on the left, pick the desired Action type. The platform supports the following Action types:
|

|
Send Email
|
Trigger the deployment of a Messaging Campaign in the Email channel.
|
|

|
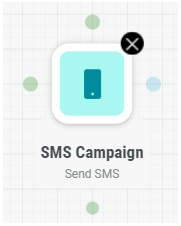
Send SMS
|
Trigger the deployment of a Messaging Campaign in the SMS channel.
|
|

|
Send Notification
|
Trigger the deployment of a Messaging Campaign in the Push Notification channel.
|
|

|
Grant Offer |
Grant discounts or other promotions to your consumer.
|
|

|
Mark as Lapsed
|
Set a "lapsed" flag within the EDP database to "true," indicating that this consumer is no longer actively engaged with your brand.
|
|

|
Notify Call Center |
Send information from Journey Designer to some other internal system, such as a Call Center.
|
|

|
Custom
|
Define your own actions for the journey to perform, allowing you to integrate third-party services or custom processes in EDP.
Please speak to your Technical Services team for more details on how to configure a Custom action
|
|
|
Click hereClick here
You can delete a step through either of the following methods:
-
If the step has no connectors attached to it, you can simply click the step to select it, then press the Delete key.
-
Hover your mouse cursor over the step, and click the "X" icon. If the step doesn't have any connectors attached to it, the step is immediately deleted. If the step has connectors attached to it, the platform replaces the step with a blank placeholder icon. Hover your mouse cursor over the placeholder icon, and click the "X" icon again; the step is deleted.
If the deleted step had a single connector attached to it, that connector will be deleted along with the step.
If the deleted step had multiple connectors attached to it, the platform will attempt to redraw the connectors so as to keep the basic flow intact. For example, let's say you have Step A connected to Step B, which is connected to Step C. If you delete Step B in the middle, the platform will automatically redraw the lines to connect Step A to Step C.
|
Working with Connectors
A journey is represented as a flowchart with connectors between the steps, indicating the flow of events from one step to the next. This section describes the options available for working with connectors when authoring a journey.
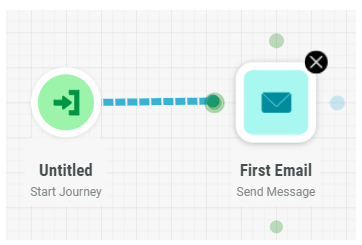
Every step has "entry" and "exit" points. In general, you use lines to show the sequence of events by connecting the "exit" of one step to the "entry" of the subsequent step, with an arrow indicating the direction of the flow. To see the available connection points for a step, simply hover your mouse cursor over the step. Green dots represent inputs, and blue dots represent outputs.

Depending on the step type, the number of connection points will vary.
-
Action: Three entry points, one exit point
-
Wait: Three entry points, one exit point
-
Start Journey: No entry points, one exit point
-
Exit Journey: Three entry points, no exit point
-
Update Journey: No entry points, one exit point
-
Decision: One entry point, two exit points (representing the yes / no decisions)
-
A / B Test: One entry point, two or three exit points
-
Advanced Decision: One entry point, two exit points (representing the true / false results of an expression)
The features available for working with connectors when authoring a journey are described below.
|
Click hereClick here
Before inserting a new connector, you should first add the two steps that you want to connect together. See "Working with Steps" above for more information.
-
Click-and-hold on the blue "exit" dot of the first step (sometimes referred to as the "source" step).
-
Drag-and-drop your cursor onto the green "entry" dot of the second step (sometimes referred to as the "target" step). The green dot will pulsate, indicating a valid drop target. The platform draws a line between the two steps, with the arrow pointing at the target step.

Note: You can't move an existing connector to point to a different step. For example, if you have Step A connected to Step B, and you instead want Step A connected to Step C, you can't simply re-position the existing connector to point to Step C. Instead, you must delete the existing connector, then add a new one that points from Step A to Step C.
|
|
Click hereClick here
The platform allows you to add a text label (up to twenty characters in length) to a connector line. This feature is particularly useful for Decision steps, so you can label the yes / no paths.
To add a text label to a connector:
-
Click the connector to select it. The connector changes to a blue dashed line to indicate that it's selected. The Step Connection pane is displayed.
-
Within the Step Connection pane, enter the desired text into the Label field.
-
By default, the platform places the text label at the midpoint of the connector. Optionally, you can adjust the text label position on the connector in order to improve the readability of the journey. Within the Step Connection pane, move the Label Position slider left to adjust the label closer to the source step, or right to move the label closer to the target step.
|
|
Click hereClick here
To delete a connector:
-
Click the connector to select it. The connector changes to a blue dashed line to indicate that it's selected.
-
Press the Delete key.
|
|
Click hereClick here
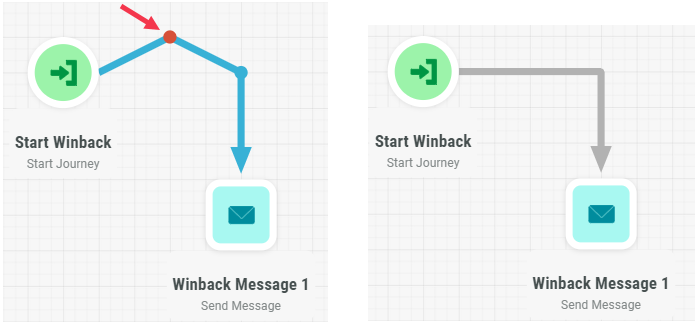
Optionally, you can create anchor points along a connector to change the line's shape and configuration. Anchor points are purely cosmetic, but they can improve the journey's readability. To add an anchor point to a connector:
-
Double-click on the connector where you want to insert the anchor point. The platform adds a dot to the line, representing the anchor point.
-
Click-and-drag the anchor point to its desired position.

|
|
Click hereClick here
To delete an existing anchor point:
-
Click on the anchor point to select it (being sure to click the anchor point, and not the connector). The anchor point changes to red to show that it's been selected.

-
Press the Delete key. The platform redraws the connector.
|
|
Click hereClick here
A Decision step allows you to create two branches within the journey, based on the results of a Segment. Recipients selected by the Segment progress down the "True" path, and other recipients progress down the "False" path. You must identify which of the two connectors coming out of the Decision step represents the "True" path, and which is the "False" path.
First, you must add the Decision step to the journey canvas, and add two output connections from it. Then, to set which connection is true, and which is false:
-
Click the connection coming out of the Decision step that represents the "True" branch. The connector changes to a blue dashed line to indicate that it's selected. The Step Connection pane is displayed.
-
Within the Step Connection pane, click the True radio button. The platform automatically makes the other connector the "False" path.
-
To make the journey easier to read, the best practice is to label the two exit connectors from a Decision step, such as "yes / no" or "true / false" or some other meaningful descriptor. See "Label a Connector" above for more information.
|
Back to Self Service Journeys
 Authoring a Journey (EDP)


