 Abandoned Cart: Configuration (EDP)
This Help system uses the terms configuration and authoring to describe the two methods of editing a journey.
Configuration refers to the process of associating supporting assets (such as Campaigns or Segments) to steps in the journey flow. For example, if you have a Send Email step in the flow, you must configure the step by selecting the Messaging Campaign associated with this step. Configuration is required for all journeys, even if you're using a standard journey.
Authoring refers to the process of editing the flow of events in the journey, such as adding or removing steps, drawing connection lines between steps, and so forth. If you're using an "out of the box" standard journey, you may not need to do any authoring; you can simply configure the steps in the standard journey and publish it. However, you need to author the journey if you want to make any changes to the steps that comprise the journey, or if you're building a new journey from scratch.
This Help topic focuses on how to configure a standard journey. For more information on authoring, please see Self Service Journeys.
EDP Assets
This section describes the EDP assets needed for the Abandoned Cart journey that you are responsible for creating. Other EDP assets (such as Activity Types and Triggers) will be setup for you by your Services team.
Segments
The standard Abandoned Cart journey uses one Segment -- Has Mobile App. This Segment selects the consumers who have installed your branded app on their mobile device.
To view your Segments, select Audiences > Segments from the EDP navigation menu.
Note: This topic does not go into details on how to build Segments. For information on building Segments in EDP, please see the EDP Online Help or speak to your Technical Services team.
After you create and publish the Segment, you must associate it with the Decision step in the journey itself. A Decision step allows you to apply a logical condition to the journey to split consumers into a "yes" path and a "no" path. For more details on this process, see "Journey Configuration" below.
Messaging Campaigns
The Abandoned Cart journey communicates with consumers by means of Email and Push Notification Campaigns created and deployed from Cheetah Messaging.
Note: This document does not go into details on how to create Campaigns. For more details on this process, please see the Cheetah Messaging Online Help system, or speak with your Technical Services team.
When creating the Email Campaigns, they should be built with the following configurations:
-
Use EDP or a Messaging table as the data source for the Campaign.
-
Campaign Type is Event-triggered.
Using EDP as the data source provides additional functionality, such as integrated access to EDP Segments and Loyalty objects, at-send-time decisioning and optimization, and support for Machine Learning models.
When creating the Push Notification Campaigns, they should be built with the following configurations:
-
Use a Messaging table as the data source for the Campaign. Please note that the platform does not yet support Push Campaigns that use EDP as their data source.
-
Campaign Type is Event-triggered.
You can mix data sources within the journey. For example, you could use Email Campaigns that use EDP as their data source, and Push Campaigns that use a Messaging table as their data source.
The rest of the Campaign configuration follows a normal Campaign setup -- select your Sender Profile, enter the message content, optionally send proofs, then launch the Campaign.
After you create and launch the Campaigns for this journey, you must associate each of them with an Action step in the journey itself. For more details on this process, see "Journey Configuration" below.
Using Offers in Email Content
Please note that if you intend to send a Loyalty Offer within a Campaign, the Campaign must use EDP as its data source. The platform does not support the use of Loyalty Offers in Email Campaigns that use a Messaging table as their data source.
|
To add an Offer into message content:
|
Loyalty Offers
The standard Abandoned Cart journey uses an Offer to present the consumer with a special promotion. The Offer details are communicated to the consumer through an Email Campaign.
The details of the Offer itself are fully customizable. The Loyalty platform supports several Offer types, such as barcodes, coupons, and certificate codes. To access the Offers screen, select Campaigns > Offers from the Loyalty navigation menu.
Note: This document does not go into the details on how to create Offers. For more details, please see the Cheetah Loyalty Online Help, or speak to your Technical Services team.
Within the context of the journey, the platform will grant the Offer to a consumer. When an Offer is granted, Loyalty tracks the details of the consumer's Offer -- including the discount rules, eligibility constraints, and expiration date -- as an "Offer Response." The Offer Response record also maintains a status, which is initially set to "Pending," meaning the Offer has been granted, but not yet used by the consumer.
After you create and publish the Offer, you must associate it with an Action step in the journey itself. For more details on this process, see "Journey Configuration" below.
Journey Configuration
Once you have built all of the necessary supporting assets, the final step in the journey setup is to create the journey, and assign the supporting assets to the appropriate steps within the journey. The standard Abandoned Cart journey is available in the Journey Library; this journey serves as a template that you can configure as needed.
|
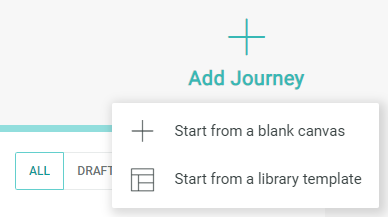
When creating a new journey, the platform allows you to either use an existing standard journey as the starting point, or you can create a new journey from scratch. To create a new journey based on one of the standard journey types:
Note: While you can create multiple instances of each of the standard journeys, only one instance can be published at a time. This restriction will be eliminated in a future release of Journey Designer. |
Action Steps
Within Journey Designer, an Action step refers to a process that the platform executes. The standard Abandoned Cart journey comprises three Send Email Action steps and one Send Notification Action step, all of which must be associated with a corresponding Cheetah Messaging Campaign. In addition, the journey uses one Grant Offer Action step, which must be associated with the desired Loyalty Offer.
|
To associate a Campaign with an Action step:
|
|
To associate an Offer with a Grant Offer Action step:
|
|
Instead of the default Action step, you can optionally remove an unneeded Action step. To remove an Action step:
|
|
Existing Action steps in a journey can be replaced with alternatives in order to meet your business objectives. To swap an existing Action step with a different Action step type:
|
Decision Steps
A Decision step allows you to apply a logical condition to the journey to split consumers into two paths. In the context of the Abandoned Cart journey, the platform uses the Has Mobile App Segment to split consumers into a Push Notification path or an Email path. Once your Segment is built, you must associate it to the Decision step in the journey.
|
To configure a Decision step:
|
Wait Steps
Within Journey Designer, a Wait step is used to allow an appropriate period of time to elapse before executing the next step in the journey. All of the Send Email and Send Notification Action steps within the default Abandoned Cart journey are followed by a Wait step. After this wait time has elapsed, Journey Designer progresses the consumer to the next step. The duration of each of these wait times can be configured to meet your business requirements.
|
To configure a Wait step:
Note: Optionally, you can disable a Wait step if you want the journey to immediately move to the next step; simply set the wait time duration to zero.
|
Save and Publish a Journey
The final step in the journey configuration process is to save and publish the journey.
|
To save your journey, either:
When you save your journey, the platform validates that the journey flow is valid. If your journey encounters any of the following errors, a message is displayed indicating the nature of the issue. Correct the issue, and retry the save process.
Note: You can't publish a journey until you have successfully saved it.
|
|
When you publish a new journey, the platform changes its status from "Draft" to "Running." The journey is then considered live and in use, and the platform can begin adding consumers to it. To publish a journey:
|
|
Whenever you make changes to a live journey, you must re-publish the journey in order to apply the changes. When you re-publish a journey, all new consumers added to the journey from that point forward will use the new configuration. For consumers currently in the journey, only consumers that have not yet reached the modified step (or steps) will be affected by the new configuration. To publish changes:
Optionally, you can also discard the changes to roll-back to the "last published" iteration of the journey. To discard changes:
|