 My Journeys
Overview
The My Journeys screen displays a list of all your current journeys, as well as their status.
The possible status values for a journey are:
-
Draft: The journey has been created, but not yet published.
-
Running: The journey has been published, and is in active use.
-
Stopped: The journey has been published, but has been temporarily paused from adding new consumers. Consumers who would normally be eligible to join the journey will not be added to the journey; consumers who are already in the journey will continue to progress through the journey as usual. A stopped journey can later be resumed, which will allow eligible consumers to again be added to the journey.
-
Failed: The journey has been published, but has encountered an error.
-
Archived: The journey has been removed from active use.
Access
To navigate to the My Journeys screen, click Journeys from the top navigation bar in Journey Designer.

Features
The features available from the My Journeys screen are described below.
|
To filter the journeys that are displayed on the My Journeys screen:
|
|
To view or edit the details of a journey:
|
|
The menu icon (three dots) displayed next to the journey status is used to change the status of this journey.
Depending on the journey's current status, this menu allows you to make the following changes:
Whenever you make changes to a live journey, you must re-publish the journey in order to apply the changes. If a journey currently has un-published changes, an exclamation point icon is displayed next to the journey name.
Select Publish Changes from the menu icon to re-publish the journey and apply the changes. If you want to discard the changes, select Discard Changes from the menu icon. |
|
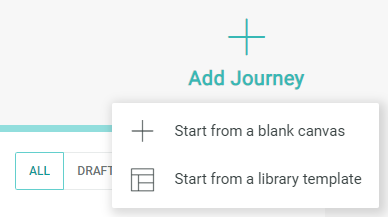
When creating a new journey, the platform allows you to either use an existing standard journey as the starting point, or you can create a new journey from scratch. To create a new journey based on one of the standard journey types:
Note: While you can create multiple instances of each of the standard journeys, only one instance can be published at a time. This restriction will be eliminated in a future release of Journey Designer.
|
|
When creating a new journey, the platform allows you to either use an existing standard journey as the starting point, or you can create a new journey from scratch. To create a new blank journey:
|

