 Create a New Item: Campaign
The New Item screen allows you to define multiple items, of the same type or of differing types, then create them all at the same time.
This topic describes how to create a new Campaign through the New Item screen. In addition, Campaigns can be created through the Campaign screen, or -- for certain channels -- though an API request (see Email Campaign API or SMS Campaign API or Push Notification Campaign API for more details).
The Messaging platform is flexible enough to accommodate many work styles and process flows. If you build your creative content through some other software product, such as an HTML authoring tool for example, then we recommend using the upload process as the best method to create Campaigns within the platform. The upload process allows you to simultaneously create a Campaign item, populate all of the necessary format versions, and upload any Hosted Items needed to support your Campaign, such as images. A key advantage to the upload method is that the platform will host the images and automatically update the Campaign files with the hosted paths (as opposed to having to key in the paths manually).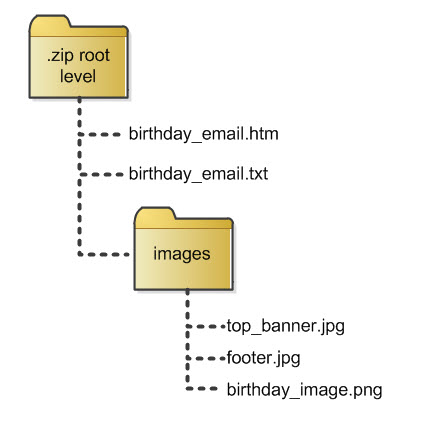
When uploading a Campaign and its associated assets (images, HTML code, etc.), the file(s) must be organized in a specific way for the system to recognize the assets that you're uploading.
First, you must create all of the necessary files to populate the different format versions needed in your Campaign. For example, an email Campaign typically has HTML and Plain Text versions, so you would need to upload an HTML file (.htm or .html) and a text file (.txt) to populate these different format versions.
Next, you must package the file (or files) into a .zip file that will then be uploaded into the platform. The files for the different format versions must be at the root level of the .zip file, and not within any folders or sub-folders. The platform supports only. zip files, and not the .zipx format.
Your .zip file can also contain any images used as part of the Campaign content. These images must be located in a folder that resides at the same level as the Campaign's format version files. The platform supports many image formats, including .jpg, png., and .gif files.
The file names for all files (including the .zip file itself) can't contain any spaces, dashes, or special characters (underscores are allowed though). Also, the file extensions should be all lowercase.
See the Example Upload section below to see an example of how to upload a .zip file containing a Campaign.
To create a Campaign, and also upload assets for that Campaign:
-
In the Tool Ribbon, click Upload. An Open File dialog box is displayed.
-
Navigate to the desired .zip file, and click open. The system processes the .zip file, and displays its contents within a slide-out panel on the right-hand side of the screen. You can close this panel by clicking the close handle.
Note: If the names of the files you're uploading don't conform to the file naming conventions described above, then the .zip file contents won't be identified and displayed correctly. In this situation, click Clear All in the Tool Ribbon. Rename the files and retry the upload process.
-
Optionally, you can include additional files to upload. Click add files. Navigate to the desired file, then click open. Repeat this step as needed to select and upload additional files.
-
The system will display all of the selected files within an asset named "Hosted Items." Optionally, if you want to exclude any files from the upload process, click the delete icon next to the file name.
-
In the list of asset types, click "Campaigns." The system adds a Campaign into the list of assets that are to be created. The default name of the Program is "New Campaign" followed by a counter.
-
To pick the folder where you want to store the new Campaign, click the "Folder" field. The "Pick a Folder" pop-up window is displayed. Select a folder or sub-folder, then click select folder. If you need to create a new folder, right-click on the parent folder, then select "New Folder" from the contextual menu. Enter a name for the new folder.
-
In the "Name" field, enter a name for your new Campaign. This name must be unique within the selected folder.
-
From the "Data Source" drop-down menu, select the source table for this Campaign.
Note: You can never modify this source table after the Campaign is created.
-
From the "Type" drop-down menu, select the Campaign type:
-
Regular One-off – an immediate one-time submission to all recipients in the Campaign Audience
-
Date-triggered – Campaign messages are submitted to all Campaign Audience recipients based on a specified date trigger
-
Event-triggered – Campaign messages are submitted to recipients based on a specified event trigger (see Event Trigger Options for more details on the types of Triggers supported by the platform).
-
Note: The Campaign Type options are not all available for every channel.
-
From the "Channel" drop-down menu, select the marketing channel that will be used to contact the consumers.
-
Depending on the selected channel, you may need to select an encoding type. From the "Encoding" drop-down menu, select a method of encoding your message content.
-
Depending on the selected channel, you may need to define the format versions for your Campaign. For example, if you selected the "Email" channel, then you'll be prompted to define the "HTML" and "Text" versions. From the appropriate drop-down menu, select the uploaded file that contains the content for that format version. The system will automatically limit the options in each menu to only the files of that type. So, for example, if you're defining the "Email HTML" format versions, only the HTML files in your uploaded .zip file will be available for selection.
-
Optionally, define any other assets that you want to create at the same time. If you need to remove an asset that you've defined, click the remove button ("X" icon) next to the asset name within the list of assets to be created.
-
When finished, click save all. The system completes the upload process. A "Success" pop-up window is displayed, listing all of the assets you created, and all the hosted items you uploaded.
-
Optionally, if you want to immediately open a new Campaign that you just created, place a check mark next to its name within the "Success" pop-up window, then click open selected. The system displays the Campaign detail screen for that Campaign. If you don't want to open the Campaign, just click close within the "Success" window.
Example Upload
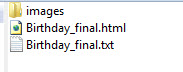
In this example, let's say you want to upload a new email Campaign, along with some images used within the Campaign content. You've created "HTML" and "Text" versions of the Campaign. The root level of your .zip file would contain the two format version files (one HTML file and one Text file), and a folder containing all of the necessary images.
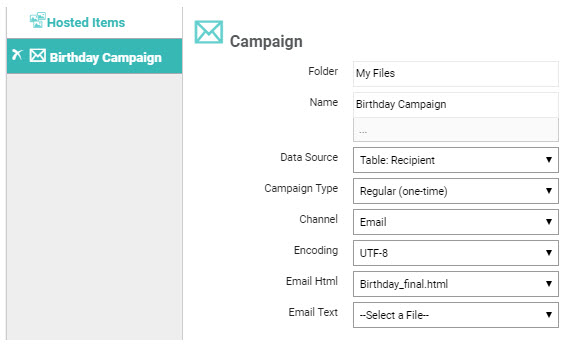
After browsing to and selecting the appropriate .zip file, you would next create your Campaign. You would then select "Birthday_final.html" as the file for the "Email HTML" format, and "Birthday_final.txt" as the file for the "Email Text" format.
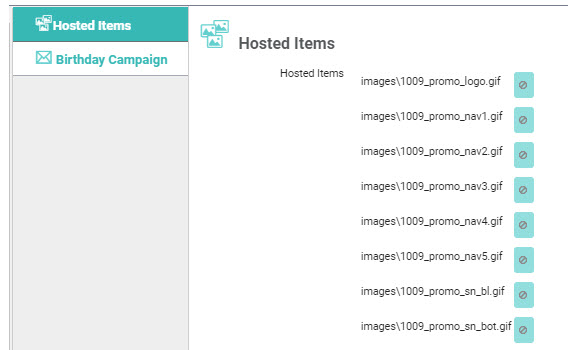
Lastly, you would select the "Hosted items" asset, and review the list of images. You can click the delete icon next to any images that you want to exclude from the upload process.
You'll notice that there's no option to select a Folder when uploading Hosted Items in conjuction with a Campaign. In this scenario, the platform will automatically store the uploaded files in a system-generated folder called "UploadedContent_<counter>." The system will also "re-path" the URLs in the Campaign content to point to the correct filepath within this "UploadedContent" folder. You can find all of your "UploadedContent" folders on the Hosted Items screen, within a parent folder named "ContentUploads."
When finished, you would complete the upload process by clicking save all. The system creates your Campaign, and populates the "Email HTML" and "Email Text" formats with the content contained within the uploaded files.