The Profile kit allows users to view personal information obtained from the registration. It also allows the users to add available information or to update them, including profile photo and social media accounts.
On this page:
Overview
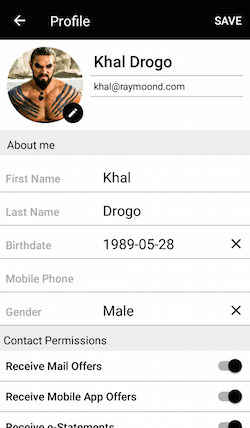
The Profile kit displays the Member’s Profile details in one page.
To include the Profile kit, open the Gradle Scripts | build.gradle (Module: app) and add the following to the
dependencies section:
implementation 'com.cheetahdigital.android:profile:<version>'
The main screen available for the Profile is the ProfileViewAndEditActivity. This Activity serves a container for the ProfileViewAndEditFragment which displays the User profile in an editable form, editing can be turned on or off using the intent key extra ProfileViewAndEditFragment.VIEW_MODE with possible values:
- Profile.VIEW
- Profile.EDIT
- Profile.VIEW_EDIT
Permissions
You need to declare the camera and write external storage permission in your AndroidManifest.xml. This is for changing the avatar image.
<uses-permission android:name="android.permission.CAMERA"/>
<uses-permission android:name="android.permission.WRITE_EXTERNAL_STORAGE"/>
Launching the Profile Activities
Assuming that the Profile kit will be launched from a MainActivity, you can follow the succeeding steps below to launch the ProfileViewAndEditActivity from a Button’s OnClickListener:
-
Add the following Profile Activity to the
AndroidManifest.xml.<activity android:name="com.cheetahdigital.profile.ui.profile.ProfileViewAndEditActivity"> <intent-filter> <action android:name="${applicationId}.PROFILE_VIEW_EDIT" /> <category android:name="android.intent.category.DEFAULT" /> </intent-filter> <intent-filter> <action android:name="${applicationId}.PROFILE_EDIT" /> <category android:name="android.intent.category.DEFAULT" /> </intent-filter> </activity> -
Launch the Activity using
Intent
Another option is to use the Fragment ProfileViewAndEditFragment
Theme Customization
The Kits leverage on Android’s built-in support for Styles and Themes. Overriding the Styles and Themes of the app will also change the corresponding Views used in this kit.
Layout Customization
Customizing Layouts via XML
You can customize the layouts of the different screens in the Profile kit by copying the layout XML’s and overriding as desired. To read more about style-able layout XMLs, please visit the Layout Customization via XML document. The XML’s used are:
layout_profile_edit_view.xml- layout used for the view and edit profile screenactivity_bio.xml- layout used for the bio pagefragment_membership_card.xml- layout used for the membership card screen
Customizing Layouts via Code
There are certain cases that you may want to use a highly-customized Layout for an Activity. To read more about this, please visit the Layout Customization via Code document.
Customizing Handlers
There are certain cases that you may want to change the default behavior of an Activity. You can achieve that by extending the Activity that you want to customize and override as necessary.
Handlers may occur in different places:
- Adapters - for Lists
- Member Variables inside Activities or Fragments
- Member Variables inside Custom Widgets - for stand-alone Custom Widgets
Just follow the steps mentioned in Overview to get a handle of the Activity/Fragment that you want to customize. The Activity/Fragment will then serve as the main entry point for customizing the Handlers.
Fully Custom UI
In order to properly display the Member’s Profile Details, we need to acquire the Profile Data and Profile Metadata from the API.
The Profile Data contains the Profile Details itself, while the Profile Metadata contains the underlying data to properly display the Profile Fields. Metadata contains information such as: labels, read-only property, gender choices for the gender picker, list of countries for the country picker, and more, which are all coming from the API.
Methods
The following are the Profile methods in the ProfileAPI:
Querying Profile Data
getProfile(ProfileParams profileParameters, boolean clearCache, Listener<Profile> listener)
Querying Profile Metadata
getProfileMetadata(ProfileParams profileParameters, boolean clearCache, Listener<BaseGenericModel<List<Metadata>>> listener)
Updating Avatar Image
updateAvatar(ProfileParams parameters, MultipartBody.Part avatar, ListenerModel<BaseModel<Avatar>, Avatar> listener)
Update Profile
updateProfile(ProfileParams parameters, ProfileFields fields, ListenerModel<BaseModel<MemberAttributes>, MemberAttributes> listener)
Connecting to Social Networks
connectIdentity(String provider, ProfileParams parameters, ProfileFields fields, Listener<SuccessResponse> listener)

disconnectIdentity(String provider, ProfileParams parameters, ProfileFields fields, Listener<SuccessResponse> listener)

getConnectedIdentities(ProfileParams parameters, boolean clearCache, ListenerModel<BaseModel<List<Identity>>, List<Identity>> listener)
Submitting Referral Code
submitReferralCode(ProfileParams parameters, Listener<SuccessResponse> listener)
Associating Profile Data and Profile Metadata
After querying the Profile Data and Metadata, you need to associate each Profile Detail to its Metadata to properly display the Profile Fields.
Given the Sample JSON below:
Profile Data
{
  "success": true,
  "data": {
    "email": "joe_smith@email.com",
    "first_name": "Joe",
    "last_name": "Smith",
    ...
  }
}
Profile Metadata
{
  "success": true,
  "data": [
    {
      "name": "email",
      "label": "My Email",
      "read_only": true
    },
    {
      "name": "first_name",
      "label": "First Name",
      "read_only": false
    },
    {
      "name": "last_name",
      "label": "Last Name",
      "read_only": false
    }
    ...
  ]
}
We now have three Profile Fields with the following details:
- label: “My Email”
- value: “joe_smith@email.com”
- read-only: yes
- label: “First Name”
- value: “Joe”
- read-only: no
- label: “Last Name”
- value: “Smith”
- read-only: no
We have achieved the profile fields above by associating:
- each Profile Data “field_name” to its Metadata “name”
- Profile Data: “email”: “…” to
- Profile Metadata: “name”: “email”
- the “label” and “read_only” fields are used for the given Profile Details
- other attributes inside the Metadata are also used this way, depending on your use case
Since associating data at runtime can be quite cumbersome, you may take a look at the ProfileFieldView and ProfileFieldViewHelper inside the Profile Kit to get an idea on how we achieved the association of the Profile Data and Metadata.